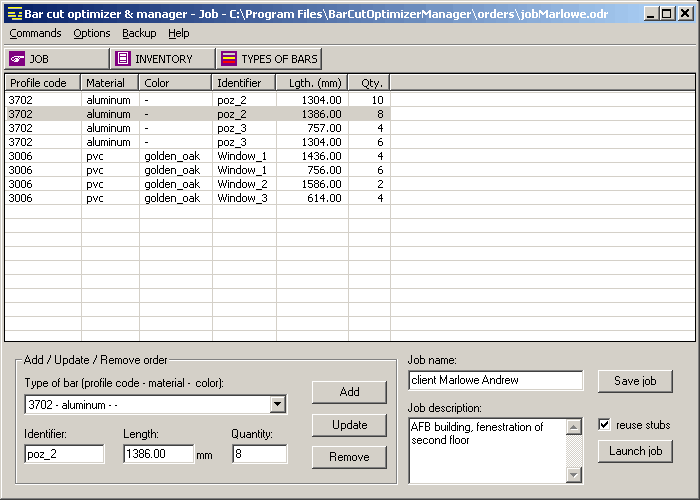
A job is a collection of orders. An order represents the bar items
that have to be cut and is composed by the following things:
-
the type of bar (profile code, material, color) used to cut items from
-
an identifier of the item (optional)
-
the length of item
-
the quantity (number of needed items)
To start a new job, click "Commands->New job" menu command.
To add an order to a job, fill the fields (type of bar, identifier, length,
quantity) in the "Add / Update / Remove order" section and press
"Add" button.
To remove an order from the job, select it in the list and press
"Remove" button.
To update an order from the job, select it in the list, modify the fields and press
"Update" button.
You can personalize the job by filling job name and job description fields.
The job can be saved anytime by pressing "Save job" button.
To open a previous saved job, click "Commands->Open job" command
menu.
The purpose of a job is to collect all the information about the bar items that
you need. To obtain these items you have to know how to cut them optimally from
the initial bars (nesting optimization). In this way, the waste will be
minimized. By pressing "Launch job" button, the optimization will
start for the current job. If the optimization is launched having the "reuse stubs"
option set then all the resulted stubs will be greater than the minimum reused length or
will be less than the maximum waste length.
 If you want to
stop the optimization process, you can press "Cancel" button. After
the optimization of the current job is done, you can do two things: create a
job report and update inventory. If you want to
stop the optimization process, you can press "Cancel" button. After
the optimization of the current job is done, you can do two things: create a
job report and update inventory.
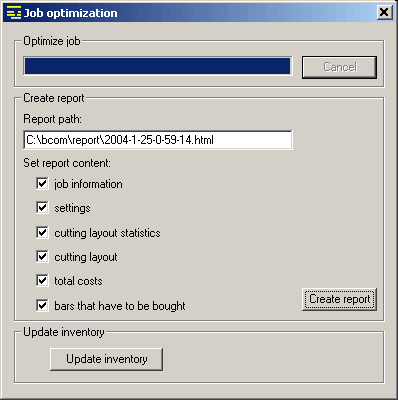
A. Job report
The main purpose of the report is to show how the bar items are cut from the
initial bars (cutting layouts). The initial bars are the bars found in the
inventory. If the inventory is empty then the initial bars represent the bars
with the default length, which must be bought. The generated report will be an
html file, having the name and path set in the "Report path" field.
You can choose the content of the report by checking the following options:
1. job information: contains the name, date, description, and the orders of the job
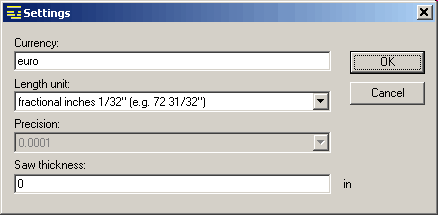
2. settings: contains information about saw thickness
3. cutting layout statistics: contains for every type of bar used in the
job, the information about used length, reused length, and waste length
4. cutting layout: contains for every type of bar used in the job,
tables that show how to cut initial bars
5. total costs: contains total costs of current job, related with used
length, reused length, and waste length
6. bars that have to be bought: contains a table with the bars that have
to be bought for the current job
Press "Create report" button to create and view the report.
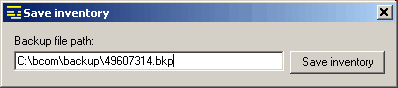
B. Update inventory
By pressing "Update inventory" button all stubs that are longer then
the minimum reused length associated with their type of bar, will be saved
into the inventory and can be used for the next job.
Important notes!
-
If you do not update inventory for the current job then the next job can use
some initial bars that are also used by the current job.
-
If you update inventory for the current job then the next job can use stubs
resulted from the current job.
|
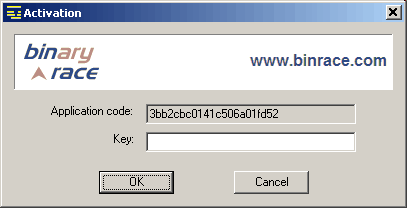 After the installation
is done, at the first time you launch the software application, a key is
requested. You have to send to us by email at bcom@binrace.com,
the application code and when we will have the confirmation that you have paid
for a license, we will send back to you the key which will activate the
software application.
After the installation
is done, at the first time you launch the software application, a key is
requested. You have to send to us by email at bcom@binrace.com,
the application code and when we will have the confirmation that you have paid
for a license, we will send back to you the key which will activate the
software application.
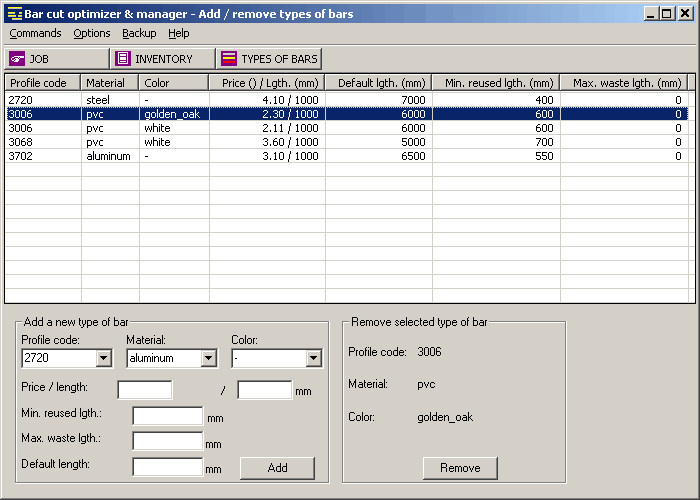
 Every type of bar has
three characteristics: profile code (e.g. 3006), material (e.g. PVC), and color
(e.g. white). You have to define all characteristics that you are going to use.
You can add or remove a characteristic of a type of bar by following these menu
commands: "Options->Profile codes", "Options->Materials",
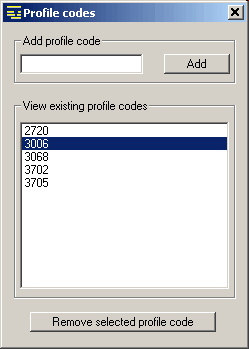
"Options->Colors". For example, to add a new profile code,
enter the string which represents the profile code into the text box and press
"Add" button. After that, you shall see the new inserted code in the
list. To remove a profile code, first select it from the list and then press
"Remove selected profile code" button at the bottom of the window. A
profile code cannot be removed if it is a part of a defined type of bar. To
remove it, you should erase all types of bars that contain the unwanted profile
code. Similar actions can also be done for materials and colors.
Every type of bar has
three characteristics: profile code (e.g. 3006), material (e.g. PVC), and color
(e.g. white). You have to define all characteristics that you are going to use.
You can add or remove a characteristic of a type of bar by following these menu
commands: "Options->Profile codes", "Options->Materials",
"Options->Colors". For example, to add a new profile code,
enter the string which represents the profile code into the text box and press
"Add" button. After that, you shall see the new inserted code in the
list. To remove a profile code, first select it from the list and then press
"Remove selected profile code" button at the bottom of the window. A
profile code cannot be removed if it is a part of a defined type of bar. To
remove it, you should erase all types of bars that contain the unwanted profile
code. Similar actions can also be done for materials and colors.
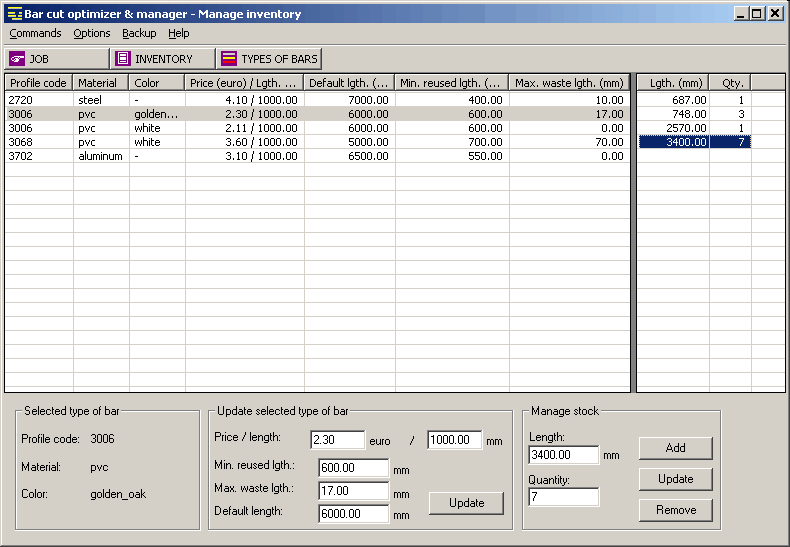
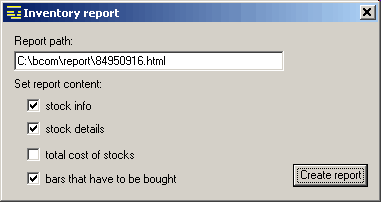 The inventory
report shows the current situation of stocks for every defined type of bar. To
create the report, click "Commands->Generate inventory report"
menu command. A dialog will be displayed which help you to create a custom
inventory report. The generated report will be an html file, having the name
and path set in the "Report path" field. You can choose the content
of the report by checking the following options:
The inventory
report shows the current situation of stocks for every defined type of bar. To
create the report, click "Commands->Generate inventory report"
menu command. A dialog will be displayed which help you to create a custom
inventory report. The generated report will be an html file, having the name
and path set in the "Report path" field. You can choose the content
of the report by checking the following options: